
The following steps will show you how to create a web 2.0 button in Adobe Photoshop.
STEP 1
Open Photoshop and create a document 640px wide by 480px high. Select the “Rounded Rectangle Tool”. Make sure the values are set to the values shown below. Draw the rounded rectangle and fill the Rectangle with Green.

STEP 2
Apply a “Drop Shadow” with the following values…
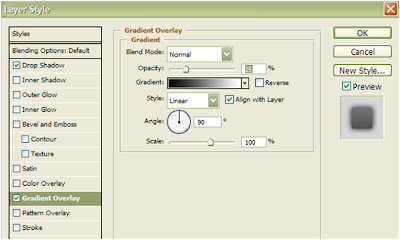
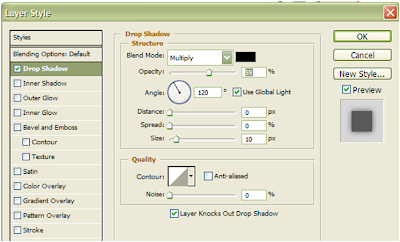 … and a “Gradient Overlay” with the following values.
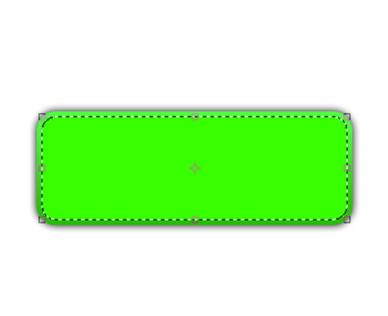
Your rectangle should look like this.
 STEP 3
Create a new layer(“Ctrl + Shift + N”). Hold “Ctrl” and click on the thumbnail for the green rounded rectangle. Then click “Select – Modify – Contract”.
Type 5 px in the window that appears.
STEP 4
Use the Paint Bucket tool to fill the selected region with a darker shade of green (maybe #1eff00). The image should look like this.
 STEP 5
Double click on the newest layer you created and adjust the “Gradient Overlay” with the following values.
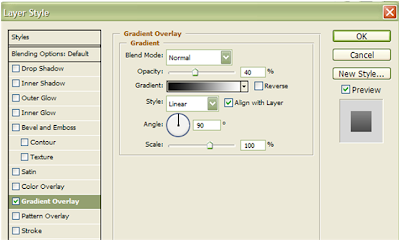 The image should look like this.

STEP 6
“Ctrl + Shift + N” to create a new layer (it should be Layer 2). Hold “Ctrl” and select the previous layer (it should be Layer 1). Click on Layer 2, select the “Rectangular Marquee tool”, hold “alt” and draw a rectangle. Press “Alt + Ctrl +D”. Type in 10px in the “Feather selection” window that appears. The selection should look like this.
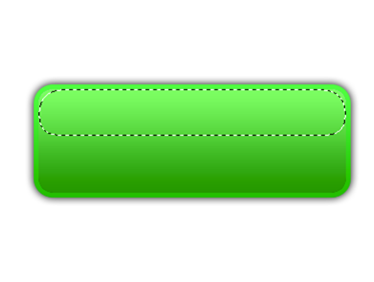 Now click on Layer 2, and fill it with white(#ffffff). Adjust the opacity of Layer 2 to 50%. The image looks like this.
 STEP 7
Type anything on the layer using (Font: Stencil at 48pts). Open the blending options for the text layer and adjust the values as below.
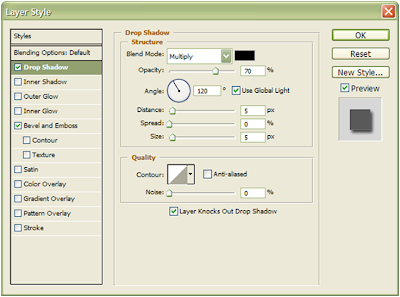
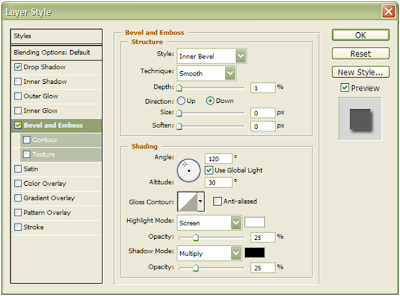
Your result should look like this.
 A little bit of adjustments here and there results in:


No comments:
Post a Comment