STEP 1
Open Photoshop, and create a document 600 pixels wide and 200 pixels high with a white background. Unlock the layer “Background” by double clicking on the layer. Now right click on the layer and select “Blending options”.
STEP 2
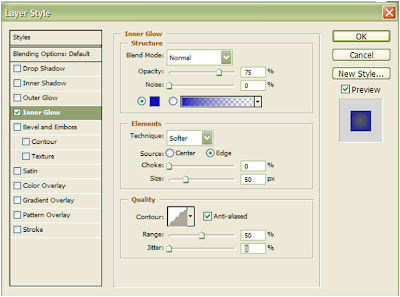
In the blending options window, select inner glow. Make sure your settings are exactly like the image shown below.
 Select “Pattern Overlay” and follow the steps below.
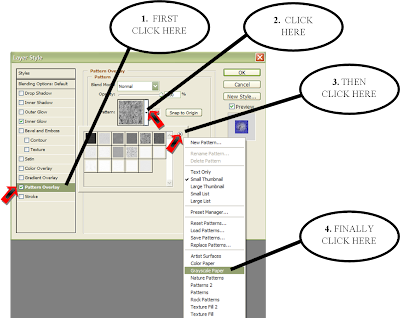
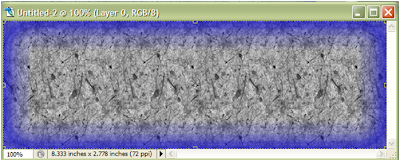
click “Ok” on the prompt that appears, then select the fifth pattern from the list of patterns. The image on the stage should look like this.
STEP 3
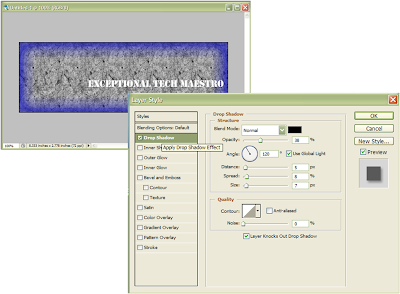
Press “T” to select the “Horizontal type tool” and type something on the Background. Right click on the layer for the text, select “Blending Options” and give the text a “Drop Shadow” with the settings shown below.
STEP 4
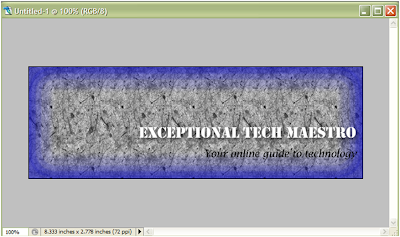
Under the first text, you can add your tag line. Your image should now look like this.
STEP 5
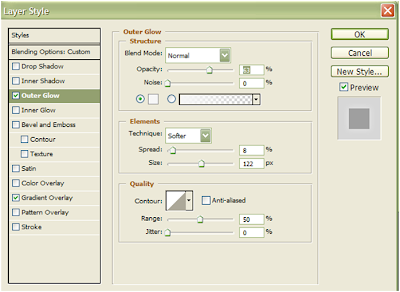
Now type your initials or abbreviation of your company. The font size should be about 150 points and the font color set to “#0d004c”. Select blending options, and give the abbreviation “Outer glow” using the values in the image below.
 STEP 6
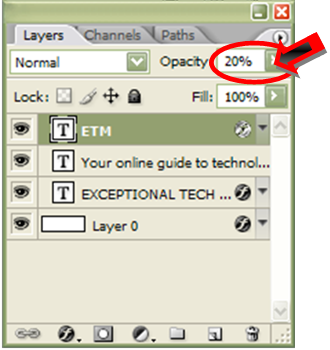
Set the opacity of the abbreviation layer to “20”
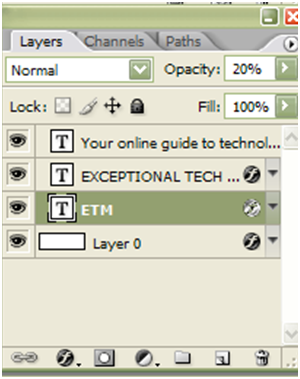
 Now move the abbreviation layer below the other texts as shown. Ensure that your layers are arranged exactly like mine.
 The sticker should look like this when completed.
 A little bit of adjustments here and there can also give this nice sticker.


1 comment:
Nice. Very detailed
Post a Comment